Showing posts with label Sewing. Show all posts

February 18, 2016

Alexa's Room... A WIP

Three months in, and I've finally made a crack at decorating my child's room. Go me. But in all fairness, she's pretty damn cute, so cuddling with her is top priority these days! 

But there's something to be said for baby monitors because there's only so much sitting around you can do while mentally writing your to-do list. Bless whoever made them as awesome as they are today, with the video and sound, and being able to talk to the baby without having to walk down the hall or up the stairs. And we didn't get one that hooks up to Wi-Fi because the stories of idiots hacking into baby monitors and talking to the babies freaks me the hell out. No. Thank. You. 

Yikes, did you enjoy that little trip we took on my tangent... Anyway...

My sister, Averil, brought the ribbon bunting thing over from Singapore, and amazingly enough, it matches the quilt I'd made Alexa almost perfectly. And it's not as if we coordinated our efforts either. She'd gotten that for a friend's wedding, and brought it over since her friend didn't want to hang on to it. I love when things work out like that :)

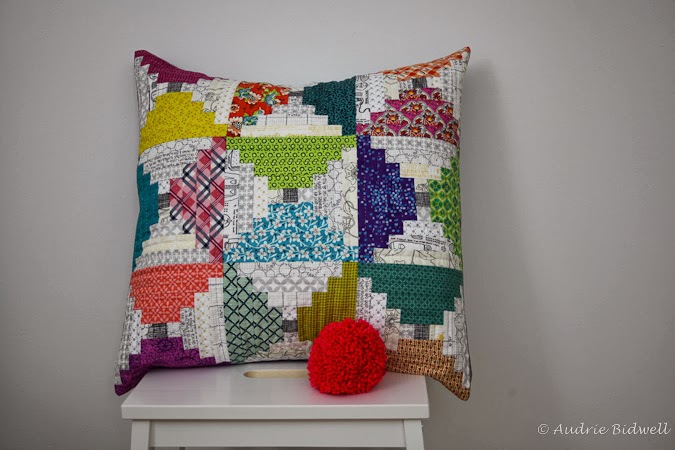
Plus I didn't want to hang anything too heavy over her crib because I'm paranoid about things falling. Not that anything ever has fallen... Just paranoid because why the hell not :)

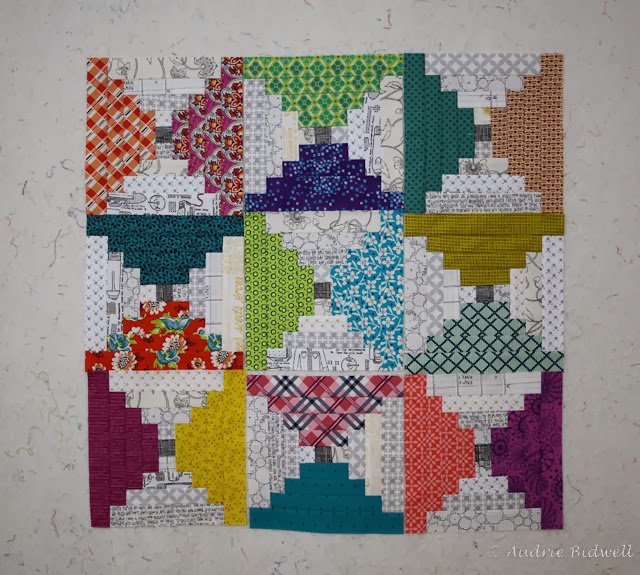
And yes, of course there's kitties on the quilt. Kitties all over the place. This kid of mine is going to love cats whether she wants to or not :)

I'll do a separate post on the quilt... I need to take photos when it's nice and sunny. Somehow when it's sunny, I've got my arms wrapped around the baby. 

Aside from the ribbon bunting thing (seriously, what is it called?!) I made her this banner. This is my third go at a banner... The hubs just hung his head and laughed when I told him how many times I attempted it lol! The first one, I'd used skinny lettering and absolutely hated it. The second one's lettering was super wonky and it made me want to stab it a lot. Third time's a charm, right?

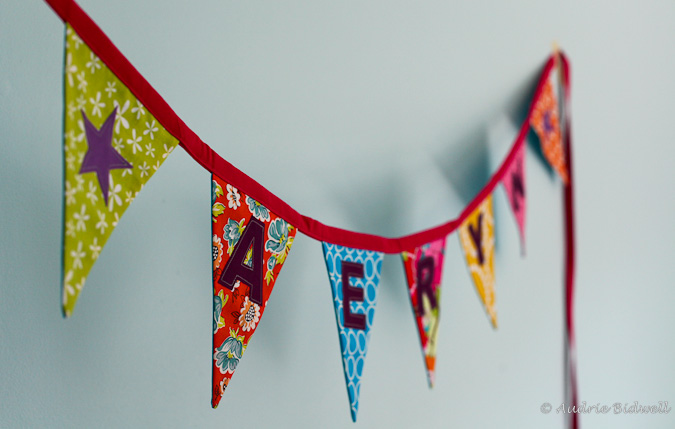
While it still isn't perfect (I'm looking at it now and thinking that's still super wonky... dammit! I drew a line and everything!), I'm quite happy with it. And if I try again, the hubs might have me committed. The banner is pretty much a copy of Secret Holiday & Co's lovely banners, but I'm not about to pay $90 when I can make them myself. I say them because you know my house is going to be filled with banners that say silly things... and I'm going to make a couple for my sisters too.

Of course being a quilter, I had to stick some fabric in there. I used a tiny floral print for the back just for something special. No idea what it's called or where I even got it from... I just found a FQ of it in one of my drawers. Yeah yeah, fabric hoarder, yada yada yada.

Isn't that little doll peeking out just so cute??? My bestie Margie sent that to Alexa and I love it so hard. It's keeping the crib warm while the baby still sleeps in the bassinet in our room.

Also, the more I look at the YAY banner, the more it seems a bit sarcastic to me. YAY. No exclamation point. Just YAY. Hehehe! Suits the doll's face!

The neon pink string on the banner makes me all kinds of giddy :) Alexa has a onesie that's got tiny neon pink flowers and it's the one clothing item I can't wait to get out of the wash and slap back on hehe

There'll be more to come... I hope? There are pictures to hang (that reminds me... Self, go buy frames) and a couple of other things I'd like to get for the room... hopefully it'll be done soon. If not, well, what's she going to do about it? Haha!

April 17, 2015

Lotta Jansdotter Doorstop

I made a doorstop and it's enormous!

I used the pattern found in Lotta Jansdotter's Simple Sewing one of the first sewing books I bought when I started sewing several years ago. The fabric is a Moda Wonderland print in linen, and I used a solid green for the handle. So cute, right? Heehee!

It's filled with rice but I kind of wish I'd used beans instead... I'm guessing they're less dense than rice? Because this damn doorstop weighs about 8-9 lbs lol I guess that door ain't movin'! :)

February 10, 2015

Another Picture, Another Pillow

I need to stop poking around Pinterest. Serious time suckage.

This time, I saw this picture (4th one down) and decided I needed to make that pillow because it'd look pretty on my cornflower blue armchair.

Insert heart eyes :)

The solids are a mix of probably Kona, Moda Bella and RJR... I'd tell you the names but since I pulled them out of a scrap pile, chances are very slim. The black is Alexander Henry Heath, that I know! I threw that one in for something a little different, and I find solid black can be very severe in my house.

Oh and just in case you'd like to know how we're doing with the blasted snow...

That's what the sliding door to the back deck looks like. Great, huh?

And this is the window in the library.

There's more coming in a few days. We're just thrilled beyond words.

A New Pillow For A New Chair

We bought a little chair from Ikea to put in a nook in our living room, and I thought it needed a pillow. By the way, I say little chair because it is wee. And by wee, I mean it was probably made with me in mind. It's 26" tall. The hubs looks absolutely ridiculous sitting in it hehe 

Anyhow, I'd gotten some pillow inserts from Crate & Barrel when we moved in. More than a year and a half ago. Whoopsies. Cobbler's children and what have you :) For some inexplicable reason, a couple of the down pillow inserts I got were 12" x 18". I don't know why. They somehow found their way into my house. I have no control over myself at that damn store, so I have no answers for you.

Some time last week, while wasting some time on Pinterest, I came across this picture of what I'm assuming is street art. The blog the picture is on calls them trees but I thought they were mountains hehe Whatever it is, I liked it enough to want to make it into a pillow!

I pulled out some scraps and did a mock-up, then pulled out some solids and sketch fabric, and set to work. And it's really the only thing to do when you look out the window and you see THIS...

Plus the hubs had taken my car to work so I was kind of stuck at home. I don't know why, but I don't fancy driving his car... Like wearing someone else's shoes...

I think it turned out pretty cute, don't you? I do realise this close up that I forgot to clip a few threads, but I'm quite pleased with how it turned out.

I didn't quite know how to quilt this at first, so I decided simple was best. I stitched in the ditch around the trees / mountains, and skinny horizontal lines that got bigger as they went up. I put a hot pink dot on the back, which somehow got hidden in every damn photo I took! Just take my word for it that it's awesome :) Hee!

This is the little area on the right of the fireplace. There's an identical odd space on the left. I've got a quilt ladder coming in a couple of weeks that'll go in the corner to sort of finish it off and give me some storage solutions for all the quilts! The leaning frames will hopefully find homes on the walls... My sister asked me if I'm doing that cool leaning-the-frames-against-the-wall decor thing. No, it's just good, old-fashioned procrastination and laziness. They've been there for longer than I care to admit... I went on quite a print buying spree, then realised I don't know where to put them all and forced myself to stop!

And the chair (it's called Gagnet, if you're so inclined) is really quite adorable. It's a bit strange yet cute, so I had to have it. I'd seen it online and decided to go have a look at it in the store. We were slightly disappointed that it was so small but both of us fell in love with it and couldn't leave without it. It was super simple to put together (basically two screws)... Truth be told, it took far longer to remove the packaging!

You might be seeing more pillows because in addition to the second 12" x 18" pillow insert, I have four 16" x 16" ones. No reason. I just have them. Pretty sure there's a 20" x 20" one upstairs somewhere. Crate & Barrel is truly dangerous... and it's just down the street. Eek.

October 10, 2014

Hexagon Mat

Love this corner of my dining room :) I made a little hexagon mat to add to this prettiness because I decided that worrying about whether the orchid pot will leak onto my buffet was not fun. I don't know how it would leak when there are zero holes in the pot, but that's how my brain works. Worrying about the dumbest things ever. 

I took a measurement of the pot with my hand because I'm super precise, and I decided something around the length of my hand would be perfect. My hands are 6" long (one day I got bored and measured my hands and feet... FYI, the latter are 8.5" long), and that's what the hexagon mat ended up being. Math! 

All the fabrics and batting came from the scraps on or around my cutting table. That's how messy it is right now :) I cut little 60° triangles, sewed them together, slapped it on some batting and backing fabric, then bound it in some extra binding I had leftover from the wedding quilt. It took me less than an hour, even with hand sewing the binding. 

In an effort to keep the orchids alive, I place them in the little bay window in the library / study to get some indirect sunlight. I read somewhere that that's what they need, so I'm being a good orchid mummy.

Also, do you see the lovely autumnal leaves outside??? The birch trees are turning a beautiful yellow, and the other trees around our house are turning a gorgeous orangey red. Love this time of year :)

February 7, 2014

Hourglass Steps Pillow Tutorial

As part of Amy's Pillow Collective this week, I've dreamed up a little pillow tutorial! If you've just arrived via Amy's blog, welcome! :)

I decided to make a pillow out of my beloved courthouse steps blocks, but just a wee bit differently than I have in the past. Something with contrast is always lovely, so I decided on using colours with low volume, and arranging them to look like almost like hourglass blocks.

This is a great project if you have leftover strips and scraps from other projects. Goodness knows we have plenty of those!

What you'll need:
9 - 1.25" square centres
18 strips of colours - 1.25" x 21" long each
About a 1/4 yard worth of low volume fabrics cut into 1.25" strips
24" square backing for the pillow top
23" square piece of batting
Two pieces (20.5" x 13.5" each) of fabric for the pillow back

For each low volume section, cut:
1.25" x 1.25"
1.25" x 2.75"
1.25" x 4.25"
1.25" x 5.75"

For each colour section, cut:
1.25" x 2.75"
1.25" x 4.25"
1.25" x 5.75"
1.25" x 7.25"

Start by sewing the 1.25" square low volume pieces to the top and bottom of a centre square. Press, trim, and sew the 1.25" x 2.75" strips of colour fabric to either side.

There, you have your first steps.


Trim, and repeat thrice more until you get a block that measures 7.25" (unfinished).

I chose to mix up the low volume fabrics since they all have different colours to them (black, grey, yellow, cream, white), and I didn't want them to stand out too much against the coloured blocks. All mixed up, they become sort of uniform in their value. You could use one single fabric for the background, or group them like I have the coloured sections, whatever looks the best to you.

Here are my first three blocks :) Hubba hubba.

If you do it right, you'll start cultivating a wonderful mess :)

Make nine blocks and arrange them until you're happy with the layout, and sew them together. I like to snap a photo of my layout on my phone for reference since I'm usually too lazy to label the squares. Yay, technology.


Once they're sewn together, layer your backing, batting and pillow top, and baste. I used a white batting for this project since my low volume fabrics have mostly white backgrounds.

(Also, my mottled hand look like I have liver spots. Sigh. Tis' the plight of a pale girl...)

Quilt as desired. I went the hand quilting route and regretted it almost immediately because holy wow does it take forever. And my little fingers were quite sore after. But, my DVR is empty! Silver lining! I actually really enjoy hand quilting, but it's probably not something you undertake when pressed for time. Anyway, the pain goes away when you see the beautiful texture it creates. I mean, look at it!

Alright, back to the tutorial...

Trim the pillow top. The blocks finish at 6.75" square, and the pillow top should measure 20.5" square when finished.

Layer your pillow top and the two pieces for the pillow backing with right sides facing. Pin or use Wonder Clips if you prefer. I do. I love those little cute devils. Sew 1/4" all around, taking care to backstitch at the corners and where the edges of the pillow back start. There'll be plenty of pulling when you insert and remove your pillow inserts, so you want to make sure they're nice and secure.

Snip all the four little corners off about 1/8" away from where the two seams meet so you can turn the pillow out nicely. Once you've turned the pillow out, press the edges if necessary. The pillow should measure about 19.75" square, so a 20" pillow insert is probably ideal.

Optional: Then run around your house like a crazy person trying to find the right sized insert but only manage to find five that are far too small. Wake your husband up and annoy him with stupid questions, then remove one of your sofa pillow inserts and thank the heavens when it's the perfect size while avoiding the glare of the aforementioned angry husband. 

And there you have it, a finished Hourglass Steps Pillow :) I hope you enjoyed that and found it useful. If you have any questions, please ask! But if the question is whether I know I'm crazy, the answer is yes, yes, and yes.

I think I'm going to need to make a quilt with this pattern because it just needs to exist. Am I right, people???

Anyway, there've been so many gorgeous pillows made by gorgeous quilters this past week, and below is a list of links to all of them. I hope you find one you like (or two, or three... I won't judge) and make it!


Amy Ellis
April Rosenthal
Lisa Calle


Christina Lane
Heather Bostic
Audrie Bidwell (You are here)
Amanda Herring


Here's more details on the Pillow Collective... and there's prizes to be won!

July 17, 2013

Bunting!

Look! I made bunting! Super cute, no?! My sister, Averil asked me to make it for her friend's little girl who's turning one in October. We discussed colours and how it should look for ages (it probably wasn't ages, but it felt like it! haha!!) and then I finally decided she's not allowed to weigh in anymore. That's really the only way to go when I have to make things for her heehee!

The bunting is fairly simple and definitely fun to make... the only thing that took a while were the letters I had to applique. I don't mind applique... I just don't think I do it very well. And it took forever to find my stupid pressing sheet. It was buried under a rubble of quilty things. Ahem. Anyhow, I used Lite Steam-A-Seam 2 (mostly because that's all I had on hand...) and then stitched around the edges. It's supposed to be permanent, but I find that the edges seem to pop up just a bit.

So tada! A super bright and colourful bunting for an almost one-year-old. So excited for them to receive this! :)

December 12, 2012

Big Mouth Pouch

If you've spent any amount of time looking at quilting / sewing blogs, you've probably heard the Open Wide Zipper Pouch by Anna. I had the pleasure of taking Anna's class at Sewing Summit and told myself that I'd make one one of these days. That day has come. I made a couple pouches to carry my knitting because they look stupid in plastic zippy bags. (No offence to plastic zippy bags. Love you.

I detest zippers more than I could ever explain. They are truly heinous and I hate them. Every time I sew with them I get so irate and I just want to chuck it at the wall. This time was no different. BUT, I powered through and I have two giant pouches to show for my anger and swearing! I did break a needle and thought I was going to lose an eye... SERENITY NOW!!!

And me being me, I simply can't follow a pattern as written. I made the pouch bigger than the biggest size offered (I cut the pieces 16" long by 13" high and boxed the corners at 4.75") to easily fit any knitting I'm working on.

I also used double zippers so that they open super extra wide. Hence the name Big Mouth Pouch hehehe :) My mum's going to think the name is very befitting of me... right, Mum?

See? They open up like buckets almost... so good for when I'm digging around in there. And they zip shut with the yarn sticking out of the middle of the bag.

I know, I'm so clever.

And I used fusible fleece on the outer layer so that they can actually stand up instead of flopping over, but without being too stiff or making the layers too thick with batting.

The pouches are made from Denyse Schmidt prints... I think the blue one is from the Richmond collection. The other might be Fancy Free? I've completely lost track of her collections at Joann's. The lining is just some leftover Moda Dottie left over from my Single Girl quilt backing. Might as well put it to use, plus grey goes with pretty much everything.

You've already seen my Array Cowl that's in the orange pouch, but the colourful knitting in the blue pouch is a cowl based on the Leftovers Cowl but instead of leftovers, I'm using a stripey sock yarn. It's just knit in the round as a tube, and will be joined with a kitchener stitch (I started it with a provisional cast on which I'll remove later on). It's something I can knit without looking at... like when I'm laying in bed watching telly. Yes, I knit while laid in bed. You know you want to.

There'll be quilty business happening soon... don't worry, I'm not leaving quilts for knitting anytime soon :)

July 9, 2012

Rouenneries Deux Runner

I made a friend of mine a very simple table runner for... well, no reason, really. Just thought of it one day. I used French General's Rouenneries Deux, and if you haven't worked with the French General collections before, they always have such a beautiful hand and wash up sooooo nice and soft.

I used three different reds, keeping it super simple, with cream fabrics for accent. I figured with five kids, she doesn't need anything too light on her dining table! Hehe :) I just quilted it in a crosshatch with ecru thread.

Hope you like it, Manda! :)

Because Izzy doesn't seem very impressed at all.

June 20, 2012

I Am Boiling

It's only the very beginning of summer and it's a ghastly 94°F / 34.5°C today. I went outside to fetch the mail and I almost started weeping. I'm quite ready for summer to be over already, thank you. 

I'm so uncomfortable every time I have to leave the house, and I become somewhat of a vampire doing all my shopping and running errands at night LOL! When I lived in Australia, I knew where all the underground parking in the city were so those were the only places I'd go (most places shut at 5pm over there). And in Singapore, most things were underground / covered, and you don't have to go outside if you don't want to. 

We put our aircons in last night (we really waited till the very last second!) so I'm doing well until I have to venture outside. All three aircons are new so we're really putting them to the test today. The one in our bedroom is a portable one, so we're hoping it'll work as well as the usual window ones. If it doesn't, I suspect the hubs will start stabbing it. I'll be sure to take photos, don't you worry.

The cats don't seem to realise it's summer, and mummy doesn't need a warm body stuck to her, so I've got the aircon blasting. I'm currently (well, currently I'm at the computer...) sitting on the sofa sewing hexies for a bib a friend wants to gift a mutual friend's baby. I'd made the little boy the duckie quilt last year, so the scraps from that project are being used for the bib. I love scraps muchly. 

I hope everyone's keeping cool, and if you have to go outside... SUNSCREEN!!! Carry it with you. Put it in your purse, your car, your husband's car, the baby bag etc. I'll stop nagging now. 

May 7, 2012

Hexagon Bib

I made a little hexagon bib for some friends of ours who had a baby nine weeks ago and were finally going to meet her. I saw on Facebook a few days ago that the mummy had mentioned being obsessed with bibs so I thought this would be a nice little gift.

I've never made a bib before so I wasn't sure how it was going to turn out. I fudged up the placement of the dotty back (Can you believe wrong and right sides still screw me up?!?! Next time I'm using a solid back lol) so of course I only realised I'd placed them wrongly AFTER I'd trimmed everything and was about to flip the bib inside out. There was SO much swearing... so very, very much.

But it turned out pretty nicely and the proud parents are thrilled with it. Baby Liya has already blessed the bib with spit up and drool hehe I like to see things I make being used... Unlike my MIL's potholders which are still hanging on her cabinet doors!!! I told the parents I'd happily make more so please feel free to destroy this one :)

LinkWithin

Related Posts Plugin for WordPress, Blogger...