Showing posts with label Quilt-along. Show all posts

January 1, 2011

Quilt-Along Quilt... Quilted!

(Wow, I used the heck out of the word 'quilt' in that title, huh?)

I finally got round to quilting my Quilt-Along quilt last week, and I had loads of fun doing it because I didn't do the usual stipple or loopy quilting. I decided to practice my freehand free motion quilting and just make it up as I go.

The back's super colourful too... I just used scraps and extra blocks I'd made to piece a fun backing. Looks a little split personality but I love it!


I really love this quilt. I intended to give it away but that's proving difficult. And upon seeing it finished, the hubs insisted that we use this one, so it's definitely not going anywhere :)

October 15, 2010

Quilt Along: Part Twelve aka The End

We've finally arrived at the end of the Quilt-Along! :)

In this last part, we're going to attach the outer borders.

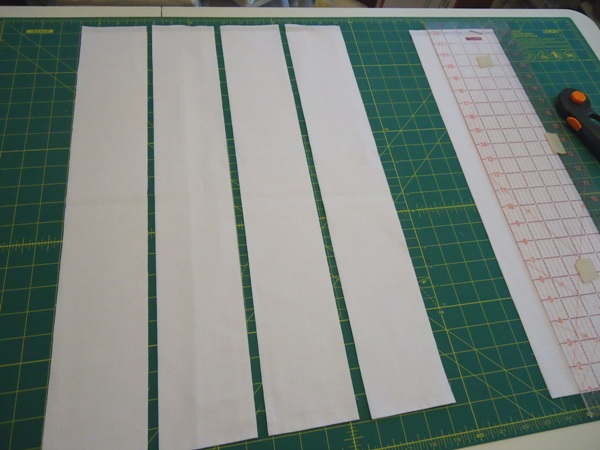
1. You'll need to cut seven strips of 3.5" the width of fabric (WOF).


2. Instead of having to figure out how much to cut per side, I like to sew the strips together (much like when you're making binding).

So with right sides facing, pin the strips together at the ends and sew.

You should end up with something that looks like this. Trim the ends of the seams and press however you wish (I like to press open).


3. I'm starting with the vertical sides, so pin your border and trim when you reach the end of the side and sew.
Repeat with the other vertical side.

4. Press the seams and trim the extra fabric.

5. Pin the border strips to the horizontal sides of the quilt and sew.

6. Press the seams and trim the extra fabric.

And there you have your finished quilt top! It should measure approximately 66" by 78" and will definitely make a generous lap quilt.

I'm really pleased with how mine turned out, even though I'll probably need sunnies when I finally get round to using it heehee


Fingers crossed I'll get round to quilting it soon! Still not quite sure how I'm going to approach that!
I mentioned in my previous Quilt-Along post that I've give you some options of making this quilt larger.

Option one:
For a twin sized quilt, you could add a 6" border in a coordinating fabric to bring the size to 78" by 90".

Option two:
And if you'd like to make it a queen sized quilt, there's good news and there's bad news. Good news is I figured out how many more blocks you need to make to bring it to 90" square.
Bad news is you're making 82 6" blocks. 42 diamonds, 20 pinwheels and 20 nine-patches in the layout above (ignore the lines in the centre...).

If you're wondering why I didn't use the larger 12" blocks, the dimensions of the original pattern aren't divisible by 12. Apologies!


If you're looking for Parts One through eleven of the Quilt-Along, here they are:

October 8, 2010

Quilt Along: Part Eleven

We're going to attach the 12" star blocks to the quilt today :)

1. Beginning with the vertical blocks, you'll want to place your blocks from top to bottom as such...

Left vertical: Nine-patch star, pinwheel star, nine-patch star, pinwheel star
Right vertical: Pinwheel star, nine-patch star, pinwheel star, nine-patch star

2. Sew the blocks together into vertical strips. Make sure you don't lose track of which is the left, and which is the right.

3. Sew the block strips to the quilt and press.

4. Now we'll attach the horizontal blocks, and you'll want to place them as such for both top and bottom...
Horizontal: Diamond star, nine-patch star, pinwheel star, nine-patch star, diamond star

5. Sew the blocks together into horizontal strips.

6. Sew the horizontal strips to the quilt and press.

Tada! You're almost done! I know, I know... you're so excited you could spit :)
If you're just joining in, here's likes to Parts one through ten.
In the next part, we're going finish the quilt with the outer borders.

I'll also give you a couple ideas of how you can make the quilt larger -- a twin (78" x 90") or a queen (90" x 90").

October 3, 2010

Quilt Along: Part Ten

We're going to put on the middle borders on the quilt in this part.

1. You'll need to cut four 3.5" strips the width of fabric (WOF).


I put on the left vertical border first and that measures approximately 42.5". The solid I'm using was wider than that, so I was able to get away with using just one strip of fabric.

If the fabric you're using is not wide enough, simply piece two strips together. (Two strips pieced together will give you enough for one vertical and one horizontal border).

2. Pin the border to the blocks and sew.

3. Press the seams and trim off the excess.

Repeat with the right vertical border.

4. Now we're going to attach the horizontal borders which measure approximately 36.5".

5. Sew on the top and bottom borders, press, and trim the excess.

(And because I'm a super dork, I totally forgot to take a picture of the quilt after I'd put on the middle borders before moving along to the next step. I plead insanity.)

If you're just joining in, here's likes to Parts one through nine.
Next up, we'll attach our large star blocks! :)

October 1, 2010

Quilt Along: Part Nine

We're going to finish putting together the smaller blocks and complete the centre of the quilt.

In Part eight, I talked about separating your smaller blocks into six stacks to make it easier for you to keep track of what block goes where. We've already attached the left and right sides to the centre with stacks a and b.

In this part, we'll be attaching four rows of smaller blocks, two on top, and two at the bottom.

We'll need ten smaller blocks for the top two rows.

1. Place your blocks like so...

Top row: diamond, pinwheel, nine-patch, pinwheel, diamond
Second row: pinwheel, nine-patch, diamond, nine-patch, diamond
(Refer to the picture above for placement.)

2. Sew the blocks together -- you should have two rows of five blocks each.

3. Sew the two rows together.

4. Attach the two rows to the centre blocks that you finished in Part eight.

And you should have something that looks like this!

Repeat this step for the bottom of the centre. Please do note that the third and last rows at the bottom are mirrored from the top two rows, and the blocks are placed like so...

Third row: pinwheel, nine-patch, diamond, nine-patch, pinwheel
Last row: diamond, pinwheel, nine-patch, pinwheel, diamond

And that's your centre blocks all finished!

If you're just joining in, here's likes to Parts one through eight.

Next up are the middle borders!

September 30, 2010

Quilt Along: Part Eight

We're now going to put together the smaller blocks that go around the centre block and border.

I've separated the blocks into six stacks from when I laid the quilt out on the floor. It also helps to take a picture of the blocks as you've laid them out for easy reference. Ask me how I know :)

The blocks are divided into...
a. Left inner blocks
b. Right inner blocks
c. Top (first row) inner blocks
d. Second row inner blocks
e. Third row inner blocks
f. Bottom (fourth row) inner blocks

It'll make sense eventually. Promise.

1. We're starting with the blocks (Stacks a and b) that'll go on the sides of the inner blocks.
The left and right are the same, so for each side, you'll need two nine-patch blocks with a diamond block in the middle.

2. Pin to the centre block and border and sew together.

Press and admire :)

3. Repeat with the right side -- two nine patch blocks with a diamond block in the centre again.

If you're just joining in, here's likes to Parts one through seven.
The next part will finish the inner blocks, and I'll post that in a couple of days.

September 29, 2010

Quilt Along: Part Seven

We're finally going to put our quilt together!

Hopefully by now you'll have a nice stack of 12.5" and 6.5" (unfinished) blocks. As you know, I made mine out of scraps, and I love how crazy and colourful it looks.

I've mapped out where each block should go, but you can always do it your own way and put the blocks wherever you choose.

Since I'd used the same fabrics in a few of the blocks, I laid out the blocks like so to make sure the same fabrics didn't sit right next to each other. Aren't they purdy? I just love star blocks :)

And here we go with the borders! You'll need a total of 1.5 yards (well 1 3/8 yards but you'd have very little room for error when cutting and straightening out) for the borders.

1. For the first inner border, you'll need to cut two 3.5 strips, cut width of fabric (WOF).

2. Choose your centre block, which should be a diamond star block.

3. For ease of attaching the borders, lay the two 3.5" strips on top of each other and trim off the centre fold.

You should end up with four strips of 3.5" by approx 22".

4. Attach the borders to the centre block.

I started on the sides then the top and bottom,but you can go whichever direction suits you.

Press and trim as you go.

And there you have your inner borders attached! The block and borders should measure 18.5" (unfinished).

If you're just joining in, here's likes to Parts one through six.
Since this part is insanely simple, the next part will be coming up later tonight. I just wanted to separate them for reference purposes.

LinkWithin

Related Posts Plugin for WordPress, Blogger...