
This is a great project if you have leftover strips and scraps from other projects. Goodness knows we have plenty of those!
What you'll need:
9 - 1.25" square centres
18 strips of colours - 1.25" x 21" long each
About a 1/4 yard worth of low volume fabrics cut into 1.25" strips
24" square backing for the pillow top
23" square piece of batting
Two pieces (20.5" x 13.5" each) of fabric for the pillow back

1.25" x 1.25"
1.25" x 2.75"
1.25" x 4.25"
1.25" x 5.75"
For each colour section, cut:
1.25" x 2.75"
1.25" x 4.25"
1.25" x 5.75"
1.25" x 7.25"


There, you have your first steps.

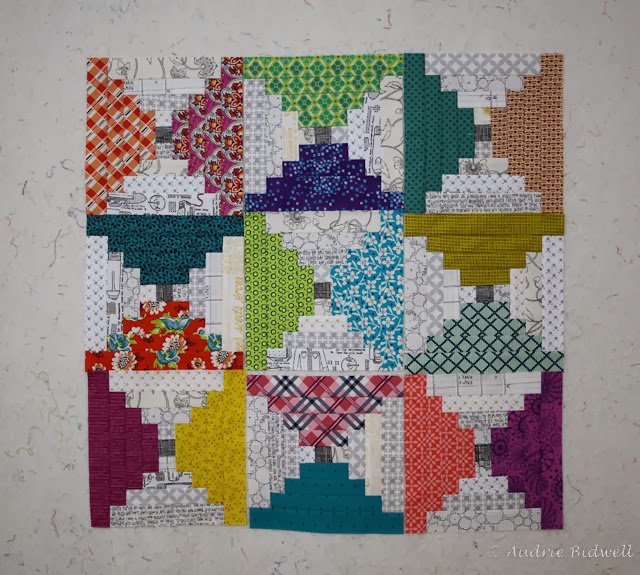
I chose to mix up the low volume fabrics since they all have different colours to them (black, grey, yellow, cream, white), and I didn't want them to stand out too much against the coloured blocks. All mixed up, they become sort of uniform in their value. You could use one single fabric for the background, or group them like I have the coloured sections, whatever looks the best to you.


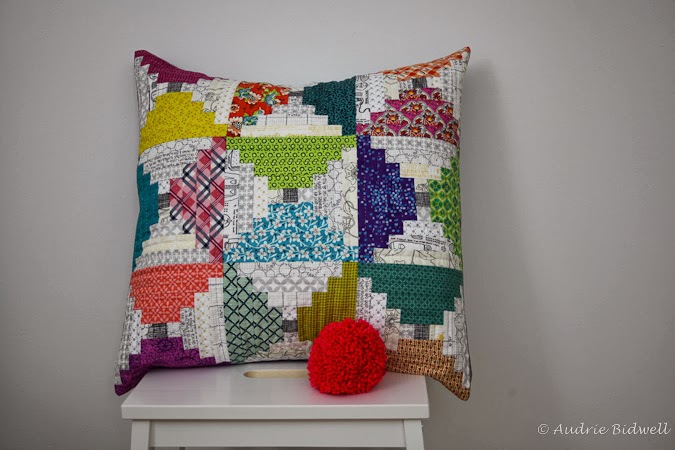
Once they're sewn together, layer your backing, batting and pillow top, and baste. I used a white batting for this project since my low volume fabrics have mostly white backgrounds.
(Also, my mottled hand look like I have liver spots. Sigh. Tis' the plight of a pale girl...)


Trim the pillow top. The blocks finish at 6.75" square, and the pillow top should measure 20.5" square when finished.


Optional: Then run around your house like a crazy person trying to find the right sized insert but only manage to find five that are far too small. Wake your husband up and annoy him with stupid questions, then remove one of your sofa pillow inserts and thank the heavens when it's the perfect size while avoiding the glare of the aforementioned angry husband.


I think I'm going to need to make a quilt with this pattern because it just needs to exist. Am I right, people???
Anyway, there've been so many gorgeous pillows made by gorgeous quilters this past week, and below is a list of links to all of them. I hope you find one you like (or two, or three... I won't judge) and make it!
Amy Ellis
April Rosenthal
Lisa Calle
Christina Lane
Heather Bostic
Audrie Bidwell (You are here)
Amanda Herring
Heather Bostic
Audrie Bidwell (You are here)
Amanda Herring
Here's more details on the Pillow Collective... and there's prizes to be won!
13 comments:
I love the fabrics you chose, and the size of your courthouse steps! You always explain things in such a way that makes a project seem doable, even for a beginner like me. Thank you for the tutorial. This is such a perfect pillow, Audrie!
gah! this is gorgeous! i might have to make a quilt like it, too. so so pretty!
Awesome pillow, thanks for the tutorial! I will definitely be making some of these - might have to make a quilt to go with them, too. :)
Love!
Wonderful pillow! think it will have to go on the list. And the tutorial is great, thank you.
Gorgeous! Great tutorial. :)
Great color like you always do. Love handquilting, texture too.
Freaking amazing!!!!! I think an entire quilt with your tutorial would be super awesome! Not too sure about hand quilting that size though:/ Thanks for teaching:)
Most definitely needs to grow up to be a mahusive quilt. What kind of thread are you using to hand quilt? Perle but not 8, right? It looks a bit finer. Anyway - love, love, love.
I love everything about your pillow Audrie! Thanks for sharing :)
beautiful. Thanks for sharing!
A quilt like that totally needs to be made! Love all the small pieces in the piecing. I may have to only partially complete the last step and just run around like a crazy person, but with joy that I'd managed to make it.
Awesome ( and funny) as usual. Love the hand quilting
Post a Comment